
Making a stir plate for homebrew yeast starters.
I got most of my instructions from Brew Your Own July-Aug 2007, and Zymugry Jan-Feb 2007 (see scans of both articles here).
You can also get some good info on building a stir plate here or here.
At left you see the original (free) 7.5 volt power supply I planned on using (more on that later).
At right is a (free) 12 volt computer CPU fan. The fun thing about this project is seeing how many of the required things you can scrounge up for free to cut down the overall cost.
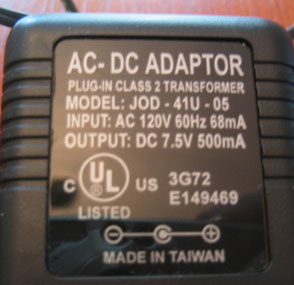
Later I discovered that the recommended 6 volt power supply would probably be better so I bought one.
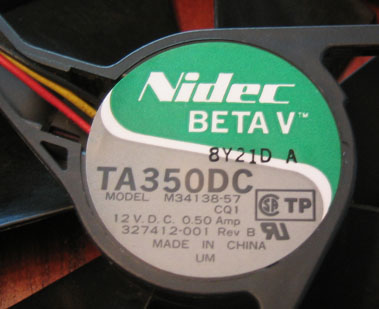
Close up of the fan harvested from a non-working server at work. I think most desktop computers have similar fans, otherwise they are pretty cheap (around $6) at Ax man or slightly more expensive to buy new.
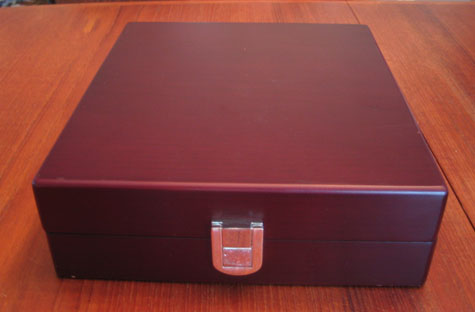
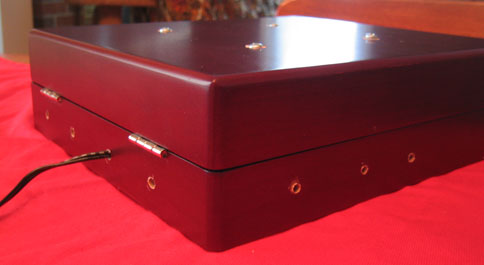
This was the nicest find at Ax Man (their homepage). I was going to go to Stogies On Grand to buy a cigar box, but I found this nice wood one for $3.95.

The felt lining might make it run even quieter than it otherwise would, which is still pretty quiet.
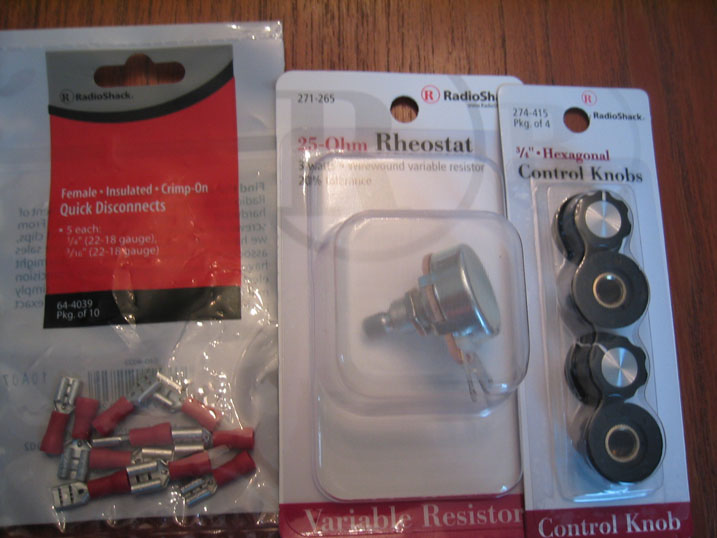
Most likely you are going to have to spend a little $ on a few parts. Here are my wire connectors ($1.99), 25 Ohm rheostat (might find it as a "potentiometer" - $3.99) and a control knob (four for $2.99 but I only needed one. Anyone else need one?)

The size of these bolts are 6-32 and they are 2" long. I got some plastic washers (instructions called for neoprene to absorb some of the vibration) and some 1/4" spacers for spacing the fan on the under side of the lid. These parts cost $1.69.

Not super pretty, but it works. The magnet sits on top of the fan (see below) so it can not be right up against the lid. That is where I used the spacers.
I am not a wiring expert but the instructions said to run one of my two power wires to the red wire of the fan. The other power wire goes to the rheostat. Finally, the black wire of the fan also goes to the rheostat. (Here you can see that very wire ends at a red quick disconnect and is in the middle of the box. That is because it was not long enough to be able to connect without partially closing the lid).

This is not my actual magnet for fan, but you get the jist. HERE is a video of me removing one of my magnets from the backing plate of the hard drive. (It is not the one I used in my stir plate but the same thing). You want to center it on the fan. I ran some tests and once I found the placement that caused the least vibration, I marked it with a marker and then glued it down with super glue.

If you can figure out a way to counter sink your screws you might be better off. I have found mine works better if I put a coaster in the middle of the screws and set the flask on that. I tried to counter sink them but did not fully get the job done. I'm sure there are many ways around this (coaster, rubber mat, etc).
I do not expect the unit to produce much heat, but still, a fan is running inside. I drilled some extra holes on the back and on one side to allow for some air flow.

I did not want to trouble myself with mounting an on/off switch on the front (i.e. too lazy to try to wire it) but I bought this in-line switch for a whopping $.29 at Ax Man, and it works just fine. Inside the switch is where I wired the old and new power lines together (more on that below).
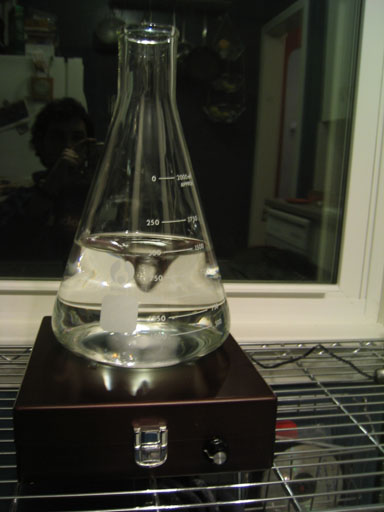
Here it is in use with a 2" stir bar. After initial testing I began to think that I needed a slightly lower voltage power supply. A 6 volt power supply was recommended and I used a 7.5 volt because it was free. I found a 6 volt for $2.95 at Ax Man. That allowed me to have more control over the speed. You can see a video of it in action.
It will be great to actually make a yeast starter and see how it does.
My total cost for parts:
wood box 3.95
on/off switch .29
bolts/washers 1.69
control knob 2.99 (for 4, I only needed one)
wire connectors 1.99
rheostat 3.99
power supply 2.95
fan free (would be like 6 - $12)
rare earth magnet free (saw a spot for them (they were out) at Radioshack for 1.99) how I removed mine
total = $17.85
A stir plate can cost well over $100 for a nice, new, official one. So building one yourself is a pretty sweet and cheap way to accomplish the same thing as far as yeast propagation goes.
This does not include the cost of a stir bar (~$5 but I got one from a friend) and an Erlenmeyer flask ($23 at Ax man for 2000 ml).
**Update:**
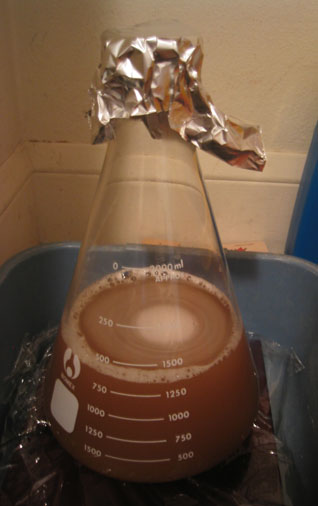
Here it is spinning its first yeast starter. Check out a video.
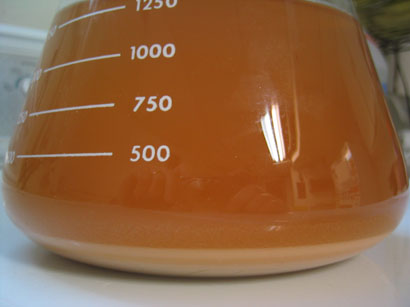
Here is the yeast it produced after 39 hours of spinning and then sitting in the fridge overnight. Not sure if it is much more than a normal yeast starter or not but it is supposed to be.